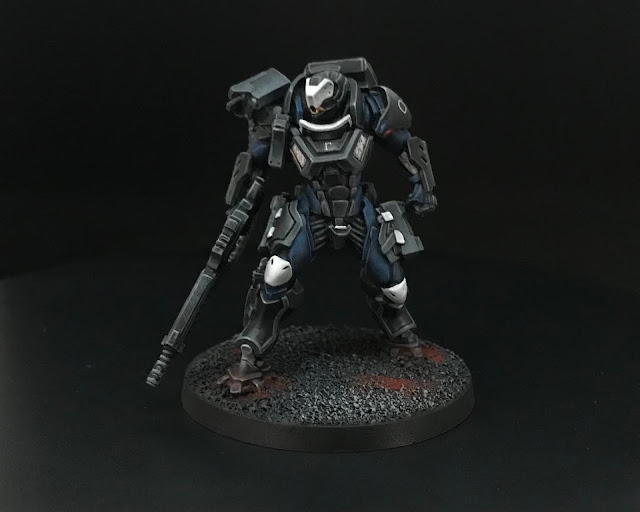
YU JING PAINTING GUIDE: YAN HUO
Yu Jing Painting Guide
Thought I'd put together a bit of a step by step guide to painting Yu Jing armour using my Yan Huos. I've included how to do the contrasting black and metal sections because breaking down a miniature into easily paintable sections is crucial to being able to paint neatly and quickly by minimising mistakes and reworking colours. These Yu Jing guys have two main sections to do: Yellow armour panels and black/metal armour cables and weapons. Each section is done in three stages: Base colour, shading and then highlighting.I used Vallejo colours and followed the colour palette used by Angel Giraldez in the Yu Jing painting set. I don't have the set myself but I just guessed how he used them based on the colour selection within the set.
I use brushes only because my airbrush is a bit dead and I spend more time cleaning it than painting lol! But to be honest I'm just more comfortable using a brush and only really find an airbrush useful for painting very large models and applying base coats. My other main tools are a wet palette and a dry palette. Lastly I have one secret toolset; toothpicks and sandpaper, which I use for scraping off lint that may stick to the paint as well as squashing/sanding little bumps of paint that accidently stick to models from time to time.
Stage 1: Undercoat

I begin with a Black undercoat. Some people prefer to use white or grey undercoats when painting a light colour like yellow. However I still prefer black as there are large sections of the model that will be black anyway and I don't want to paint black over a white undercoat. I have tried zenithal undercoating but I find that this does not really help me since I end up painting over all the model with colour anyway. It's just a bit of a waste of time for me and I prefer to study the model intenly under a light from the top in order to work out where light will be painted across the model.
I did about three coats of watered down black to get an even and smooth undercoat to the whole model. Once dry, I painted the base with a base coat of German Grey because this is a bit messy and it doesn't matter if I accidently splash a little bit on the model as I can clean it up later.
Stage 2: Armour Panel Base Coat Under Colour

It is difficult to paint yellow straight onto black so I used Orange Brown as an undercoat for the yellow armour panels. It took about one and a half watered down coats to get a clean finish. I try to be as neat as possible but I'm not fussed if I make any mistakes since I will clean this up later.
I say one and a half coats because I do one main coat and then fix up any dark splotchy bits later rather than just cover the whole thing again. Also, I always water down the paint so it flows with a consistency more like an ink over the model, rather than applying paint straight from a pot. This is crucial to neat miniature painting.
In the old Red Veil painting guide Angel skips this stage as he airbrushes yellow straight over black, but it is not possible to get a clean finish using yellow on black with a brush without painting tons of layers.
Stage 3: Armour Panel Base Coat

The next stage is the yellow base coat of the armour. Scrofulous Brown is applied in about one and a half coats. This colour paints really easily over the Orange Brown. Again I don't care if I make any mistakes when applying the yellow as this will be cleaned up later, the only thing that is important is getting an even coat of paint over the armour.

As you can see the Scrofulous Brown makes a big difference to the guy on the right.
Stage 4: Armour Panel Shading

Cavalry Brown is used to shade the model. This is the colour that tints Yu Jing models to look kinda golden orange (It's funny how there is no actual straight orange or yellow used on the official colour palette!). I thin the shade colour much more than a base paint colour so that it behaves like a wash. It is applied between all the gaps in the panels and to the underside of things rather than the top where natural light would hit the model. I also thin it down further and paint over panel areas that curv from light to dark. Splashes of mistakes are ignored again at this stage.
The shading requires a bit of thought as I'm literally applying the shadow to the model. This is where I do a bit of light sketching to get an idea of where natural light will hit the model (mostly from the top of the model but a bit of artistic licence is applied when needing to create depth in some places). I do not splash wash over the whole model as this is a basic technique that does not take into account natural lighting. Gone are the days of dipping a model in Nuln Oil or the equivalent as I'm not batch painting Infinity models compared to the hundreds of minis required for a typical GW army!

You can see the model on the right really start to come to life now with the shadow applied compared to the base colour alone.
Stage 5: Clean up black

At this point I need to carefully clean up the black parts as there are many nooks and crannies that could cause accidents and splashes on the armour panels, if left to patch up later. I try to be very neat and avoid errors but if there are any I will fix them later when I finish the armour. I also washed black over the base at this stage since it was convenient to finish up using that colour.
The black on the guy on the right is cleaned up compared to the messy guy on the left in the pic.
Stage 6: Metal Base Coat

I used a base coat of French Mirage Blue for the metal parts and gun holster, painted carefully to avoid rework. I also drybrushed the base, first with the original German Grey and then a with lighter Dark Sea Grey on top. I did the model's base at this stage since drybrushing can be messy and I want it out of the way before I paint the feet in order to avoid messing them up, plus I can simply paint over any mistakes when I do them proper.

Here's both guys looking pretty cleaned up at this point.
Stage 7: Metal Shading

I washed Black Grey over the metal parts, careful not to splash any on the armour panels. The guy on the right is done and now those parts look quite darker.

This batch of models is done (Krit was in the mix also) and are tabletop ready now but need quite a bit of work to get them to display level. Once the base coat, shading washes and drybrushing are done it is time to get serious. No more mess or room for mistakes. No more batch painting from here on out as it is too distracting to do the hard work across more than one model at a time.
Stage 8: Blending Armour Panel Base Colour 1

I wet blended a 50/50 mix of Cavalry Brown and Scrofulous Brown where those colours met on the panels, for example on the thigh in th pic above. This helps smooth out the transition between yellow and brown.
Stage 9: Blending Armour Panel Base Colour 2

I wet blend Scrofulous Brown across the armour panels to further smooth out the transition between yellow and brown. I also, at this point, carefully apply Scrofulous Brown edge highlights to all edges of the armour in order to really neaten up the model. I'm careful to leave Cavalry Brown within the gaps in the panels.

In this pic you can see the neatened and blended armor panels a bit better, particularly on the leg. Even though there is light shining down on top of the model in this photo the shadowed areas are actually painted on with the darker colour.

The guy on the right's armour is blended and cleaned up with the base colour and shade colour compared to the guy on the left.
Stage 10: Armour Panel Highlight 1

I used a 50/50 mix of Ice Yellow and Scrofulous Brown to carefully pick out the edge highlights. I don't always add this highlight to the bottom of panels and parts where light would not naturally hit the model from above. I also wet blend this mix across the upper and middle parts of the panels (this requires extremely thin layers of paint in a couple of coats).
Stage 11: Armour Panel Highlight 2

I paint a final highlight of pure Ice Yellow to select areas to make them stand out and make them really shiny looking. This stage is only applied to the top of panels and outer edges where natural light would hit them from above. Across the middle of panels I thinly wet blend the colour, with just a tiny dot of additional pure colour here and there. The armour is now finished.
(Forget the grey paint in this photo. I forgot to take a photo with the Ice Yellow alone in it)
Stage 12: Fibre Bundle/Weapon Base Colour

Black Grey was painted over the weapons and underarmour cables aiming for about 70% coverage. It was applied more liberally to the top areas rather than the bottom where light would not naturally hit the model. This is most evident on the gun for example.
I was able to drybrush the gun for the most part as it is not too close to the yellow armour. It was not possible to drybrush the cables as this would have ended up messing up the yellow armour panels.
Stage 13: Fibre Bundle/Weapon Highlight 1

Intermediate Blue was painted as an edge highlight to the black areas. It was also wet blended and/or stippled across the middle topmost parts.
Stage 14: Fibre Bundle/Weapon Highlight 2

Dark Sea Grey was blended and/or stippled as a spot highlight here and there to make the black parts really pop and bright in places. Again this final highlight is only applied to topmost areas and where natural light would reflect from the surface.
Here ends the detailed part of this guide as the majority of the model is done. I'll just briefly go over the other stages.
Stage 15: Metal

The metal areas were done in the same way as the black, with a combination of blending and stippling. The colour palette was just a bit different: Intermediate Blue base colour, Black Grey shading and Dark Sea Grey highlight. In this pic you can better see the stippling/hatching effect on both the black and metal sections.
Stage 16: Lighting and Weathering

Deep Sky blue, Sky Blue and White were used to paint the lights in the eyes. Flat Red and White where used to paint the red lights as well as the unlit lenses. A touch of black was mixed with red on the dark part of the lenses. Pure white is never used except for the reflective glare on the top of the lenses.
Cavalry Brown was washed over the heated end of the gun barrels. Cavalry Brown was then mixed with Orange Brown and drybrushed over the top of the barrels. Vallejo Pigments Burnt Umber weathering powder was dabbed on to parts of the base as well as the feet.
Stage 17: Freehand

Finally, freehand patterns and numerals are painted in black, white and red to select parts of the armour. A lot of care was taken to study patterns and designs that would work for the freehand before it was applied to the model as there is really no going back once it is painted on. I am careful to do it as neatly as possible but it always requires touching up here and there. Freehand really requires a whole tutorial in itself, which I will attempt to write up one of these days.
That's it! the miniature is painted up and ready for battle... and display on the shelf. Hope you found this painting guide helpful. 😊

I have been searching something like this guide over the internet for months!! I am struggling with black parts of the armor with yu jing... I will try the colors that you propose :) Please keep doing guides of yu jing, your work is awesome!
ReplyDeleteThanks! I will try more when I get a chance. Good luck with your painting!
DeleteDid you freehand all those markings on the helmet, arms and chest? Gorgeous model.
ReplyDeleteThank you for these tutorial I was looking for good views of the metal areas for Yu-Jing.
ReplyDeleteYour blue armor on the Ikari company is wonderful may I ask you which colors you used for them?
Looks great man! Do you mind if I ask how you did the off white sections for some of the other yu jing models? Seems like a warm off white and I haven't painted that before
ReplyDelete